Use Newforma Web Viewer/Markups
Use the Newforma Web Viewer/Markups
Use the Newforma Web Viewer to open and mark up images that are linked to project items on Info Exchange. You can launch the web viewer by opening a supported image file that is associated with a project item.
DWG and DWF drawing files are not supported.
Markup of images in the Newforma Web Viewer is not supported on mobile devices.
Use the web viewer to do the following:
Navigate the pages in a multipage file
Search terms in a PDF file or markup layers
To markup other image files or drawings, see the topic: Enable External Users to Mark Up Drawings Using the Newforma Web Viewer.
The Markup Toolbar in the web viewer has a very intuitive design. Place the cursor over any of the buttons in the toolbar for a tool-tip to help you select the tool you need.
To create a new markup session
Open the project item in Info Exchange that contains the image you wish to mark up.
In the project item, select the Supporting Documents tab or Files tab (depending on the item type) and select the file you want to mark up to open the Newforma Web Viewer. You can also view files associated with the project item from the Files dialog box, shown here, in the project item log page.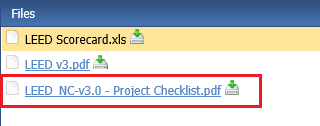
Supported files are identified with a hyperlink.
3. Use any of the tools in the toolbar, as shown below, to mark up the file when it opens in the Newforma Web Viewer.
Select  to expand the side panel to show all of the pages in a multi-page PDF file. This will help you to track changes on multiple pages.
The side panel only displays bookmarks included in PDF files. If you expand the side panel for another supported file type, or for a PDF that does not contain bookmarks, the side panel is blank.
Select  to open the Drawing Explorer dialog box to view the existing markups for the image.
For external users on Info Exchange, the list of markups displayed in the Drawing Explorer dialog box is determined by the permission set to which they are assigned.
Add the desired objects to the image using the following tools:
Select the tool or shape on the toolbar that you wish to use in the markup, then click on your image and drag to the desired size and shape.
Select  to change the color and weight of any lines and shapes that you draw on the image.
Select  to insert an image on your markup.
Select  to add a stamp. Refer to the Stamp Overview topic for more information.
Select  to export the markup to a PDF for later offline processing and sharing.
Select  to save the markup session. The markup session is now available in the Markup Sessions log and activity center.
To insert an image
If you are not already there, open the image using the Newforma Web Viewer.
To insert an image select  to open the Select an Image dialog box, as shown here. If an image is not available, select Browse to locate and select the file, then select Upload.
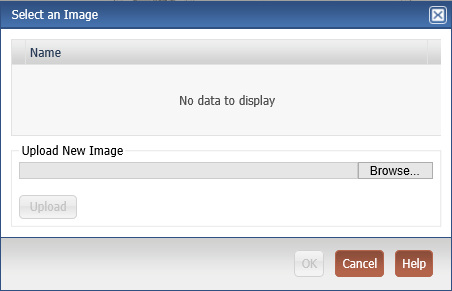
Select the image in the Select an Image dialog box and select OK. The image appears on your markup. You can drag the image to reposition or resize it.
To add a stamp
If you are not already there, open the image using the Newforma Web Viewer.
Select  to open the Select a Stamp dialog box.
In the Select a Stamp dialog box, select Browse to add a new stamp, then select Upload to publish it to Info Exchange.
You can use one of the sample stamps provided by Newforma as part of your process.
Once the stamp is uploaded, the stamp is available to you in all of your projects on Info Exchange. It is also available for all users from your same company.
Select the stamp and select OK to open the Edit Stamp Contents dialog box: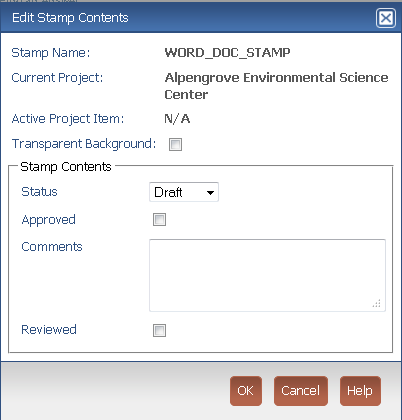
Add information to the stamp in the fields in the Stamp Contents section. Refer to the Stamp Overview topic for information on customizing the stamp.
Stamps may include text fields, combo boxes, and checkboxes that you can use to add more information to your markup. The fields available here depend upon the stamp.
Select OK to add the stamp to the markup.
To export the markup to a PDF
If you are not already there, open the image using the Newforma Web Viewer.
Select  to open the Export PDF Options dialog box.
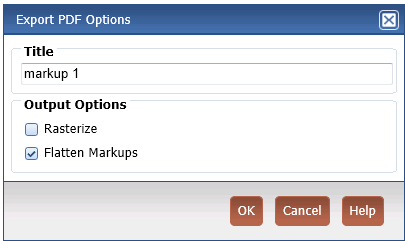
Provide a name for the file and set the desired options.
Select OK. When prompted, you may either open the file or select the location on your computer where you wish to save the file.
To use Drawing Explorer
If you are not already there, open the image using the Newforma Web Viewer.
Select  to open the Drawing Explorer dialog box, shown below. All markup sessions that have been created for this drawing appear n the list.
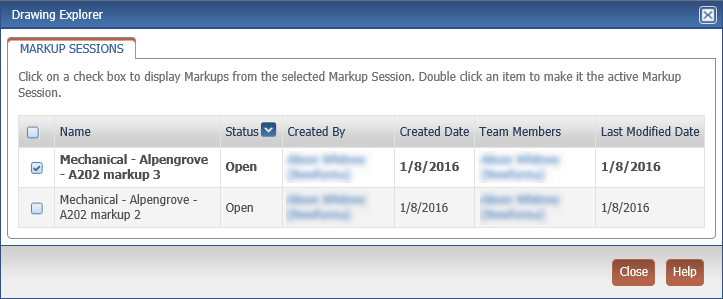
Mark the checkboxes for the markups you want to view and select Close.
Use the navigation tool, shown here, to move between pages in a multi-page document. Select the arrows to move forward or back through the image. You can also enter a specific page number to quickly navigate to that page.

To copy text in an image file
Select  to select any text in an image and copy it to the clipboard.
Place your cursor over the desired text then click and drag over the text.
Press Ctrl+C on the keyboard to copy the text to your computer’s clipboard.
To pan and zoom in a drawing
Use these tools to change the position and the size of the areas in an image file.

Select  to pan around an image. Click on the image and drag your mouse to pan.
Select  to draw a rectangle area on which to zoom. Place your cursor on the image then click and drag over the desired area.
Select  to zoom to the full page to display the entire image.
To rotate a drawing
Select  to rotate the image file 90 degrees in a clockwise direction.
To use Search to find words in a PDF or a markup layer
Enter the text you want to search for in  then select
  to initiate the search.
The search feature in the Newforma Web Viewer finds text created in the actual image as well as any text added using the markup tools.
The Newforma Web Viewer search applies only to the current drawing. Use Info Exchange’s search feature if you want to search for text across an entire project or multiple projects.
The search feature in the Newforma Web Viewer does partial string matching on each individual term in the search string, not whole word matching like the main search feature in Project Center.
For example: if you type in africa hall concrete, Search will return any text that contains any of those words, such as “ABC africa 123″ or “marshall.”
To access the Newforma Web Viewer
You can access this application in the following ways:
Select a markup session from the Markup Session log in Info Exchange. In the main menu, select View > Project Information > Markup Sessions.
Select a markup session from Related Items tabs throughout Info Exchange.
Select a PDF from the Supported Document tabs throughout Info Exchange.
Select  in the logs throughout Info Exchange to open the Files dialog box.
Related Topics
Markup Drawings Using the Newforma Web Viewer
Stamp Field Definitions and Sample Stamps
.
