Batch Create Projects
Batch Create Projects
Use this topic as a guideline for defining, modifying, importing, and creating large numbers of Project Center projects.
You must be a Project Center administrator to perform this procedure.
The Batch Project Creation dialog box gives you several different ways to batch create projects. Click one of the following links to go to that section of this topic:
To import projects from a template spreadsheet
To add or modify projects using basic information
To batch modify projects in an Excel spreadsheet and import them
To import projects from a template spreadsheet
The first way you can batch create projects is by importing them from an existing spreadsheet. This process is explained in the following procedure: Batch Import Projects from a Spreadsheet.
To add or modify projects using basic information
The next way you can batch create projects is by entering basic project information.
If you are not already there, open the Project Center Administration activity center (shown below) by clicking Project Center Administration from the Tasks panel of the My Project Center activity center, or from the Activities list.
Click the Projects tab.
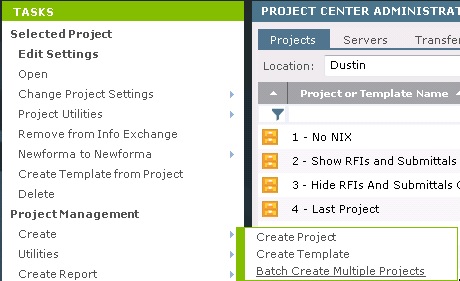
Click Create > Batch Create Multiple Projects from the Tasks panel, as shown here, to open the Batch Project Creation dialog box, as shown below:
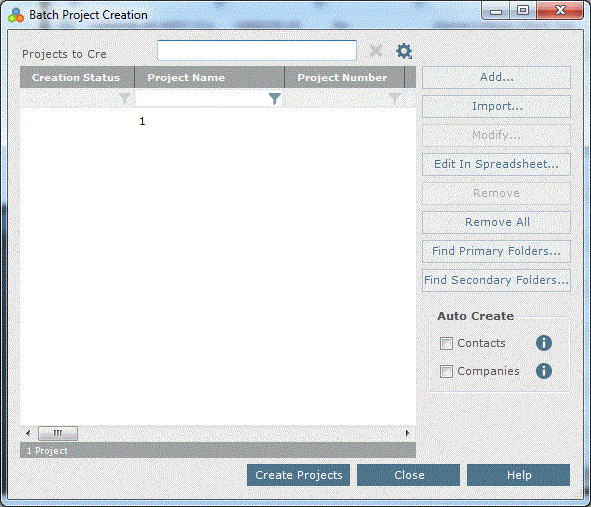
Click Add to open the Add Project dialog box, as shown here: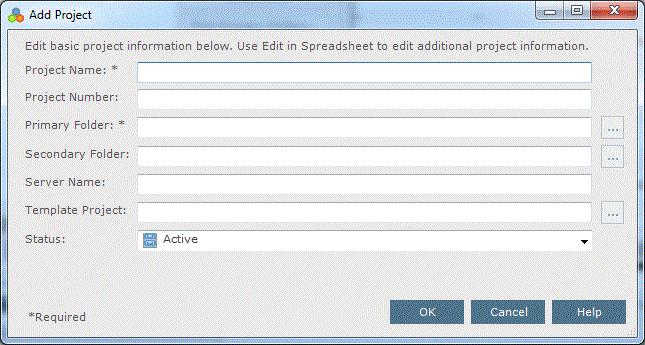
If you want to modify existing project rows, select them from the Batch Project Creation dialog box and then click Modify instead of Add to open the Modify Project dialog box.
Fill in at least the required fields (Project Name and Primary Folder). If you want to add more project information, import the information from a project template by clicking the  button to locate it.
Click OK to add the project row to the Batch Project Creation dialog box. Repeat this section as necessary for each project you want to add.
Click Create Projects from the Batch Project Creation dialog box to create the projects. If there are any errors, hover over the Error column to view the message.
To add projects from an Excel spreadsheet and link them to their project folders, and automatically add contacts and companies
The next way you can batch create projects is by importing project names numbers? and the primary folder from an Excel spreadsheet and then linking the project numbers to their project folder locations.
Status is required, but it will default to Active if it is not defined.
If you are not already there, open the Project Center Administration activity center (shown below) by clicking Project Center Administration from the Tasks panel of the My Project Center activity center, or from the Activities list.
Click the Projects tab.
Click Create > Batch Create Multiple Projects from the Tasks panel, as shown here, to open the Batch Project Creation dialog box, as shown below:
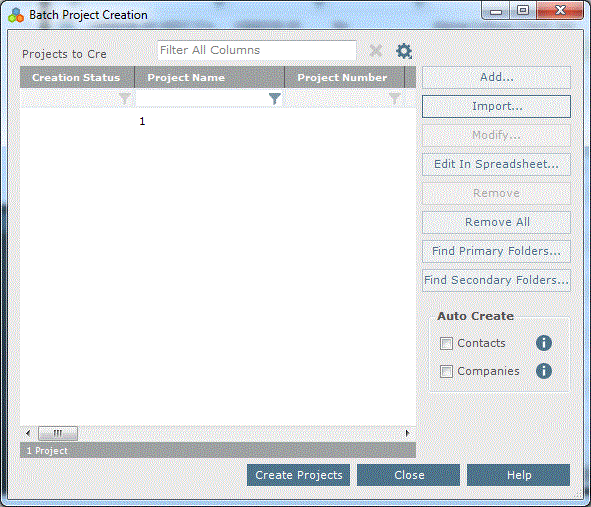
Click Import to open the Select Spreadsheet dialog box. Locate the spreadsheet and import the project data. Each project number from the spreadsheet will become a row in the Batch Project Creation dialog box, as shown in this example: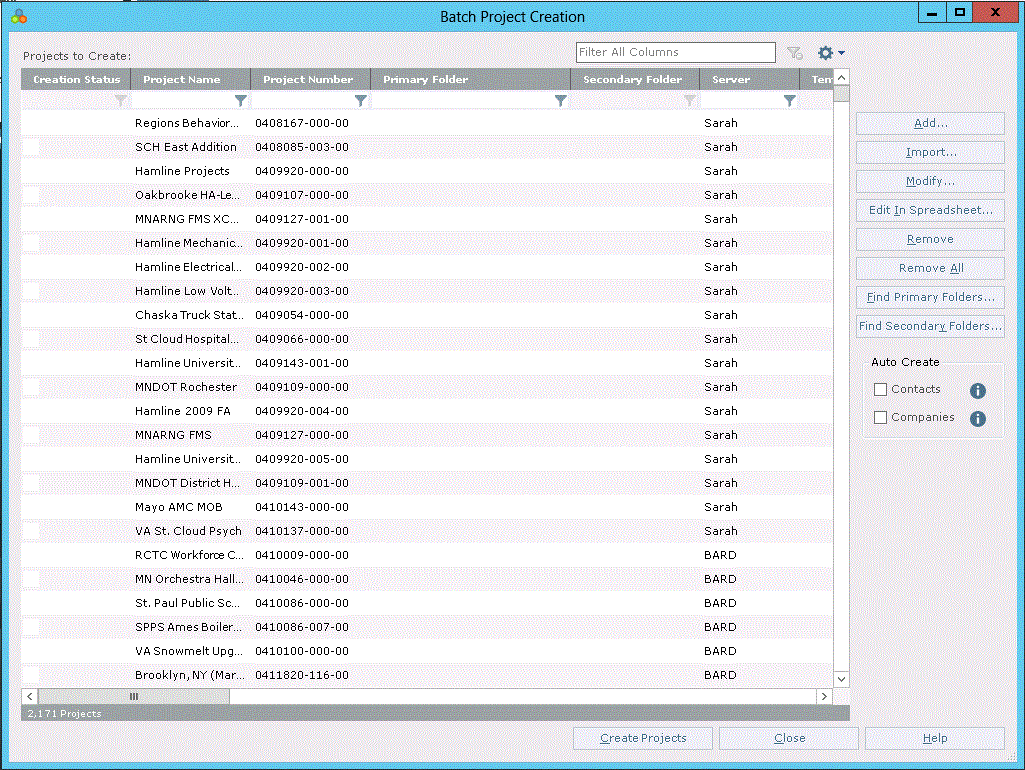
At this point the primary (or secondary) project folders are missing. You have two options for creating the projects from here: You can continue with step 6 in this section to try to locate and link the project folders to the project numbers automatically, or you can go to the To batch modify projects in an Excel spreadsheet and import them section below and edit the spreadsheet manually.
Click Find Primary Folders to open the Find Primary Folders dialog box, as shown here:
This button is available only if the primary folder has not been defined in the Excel spreadsheet.
To find secondary folders, click Find Primary Folders to open the Find Secondary Folders dialog box.
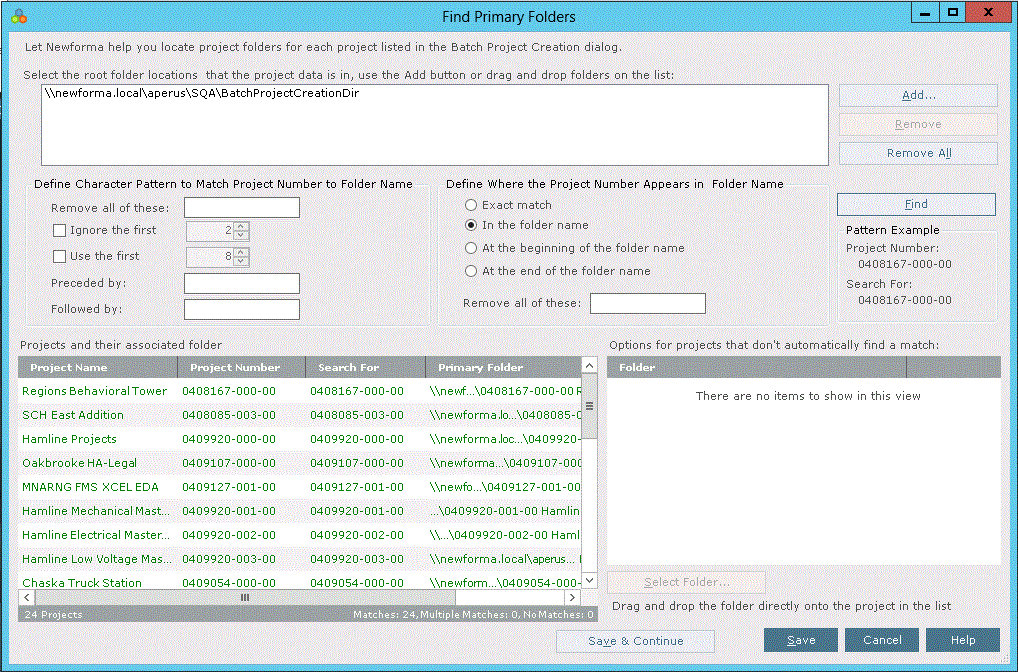
Refer to the Find Primary Folders dialog box topic to set the parameters for locating primary (or secondary) folders for each project to map the folders to the new projects you are trying to create.
Click Save from the Find Primary Folders dialog box when you’re finished configuring it. The project rows will be updated in the Batch Project Creation dialog box.
In the Batch Project Creation dialog box:
Mark the Contacts checkbox if you want to automatically create adhoc contacts and add them to the Project Center database using the email address if the contacts do not already exist in the Project Center database.
Mark the Companies checkbox to automatically add client companies as defined in the Client Company Name field if the companies do not already exist in the Project Center database.
Click Create Projects to link the projects to their respective folders and create the new projects in those folders.
To batch modify projects in an Excel spreadsheet and import them
The next way you can batch create projects is by importing project names and the primary folder from an Excel spreadsheet and then linking the project numbers to their project folder locations.
Status is required, but it will default to Active if it is not defined.
Perform steps 1 – 4 in the previous section.
Click Edit in Spreadsheet to open the spreadsheet. Add the folder information in the as shown in this example, and then save and close it.
Click OK from the message to re-import it, as shown in this example: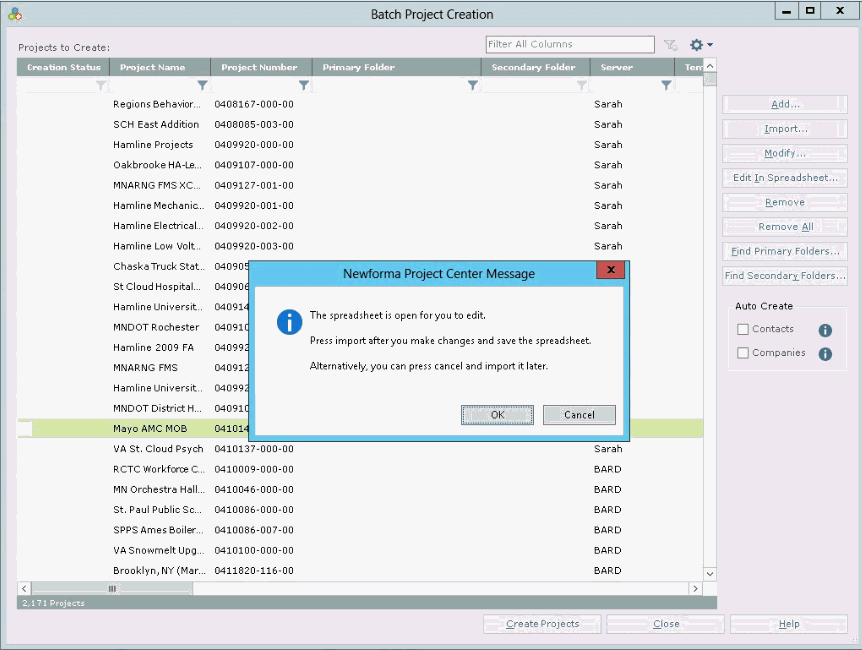
The primary folder row will now be defined, as shown in this example: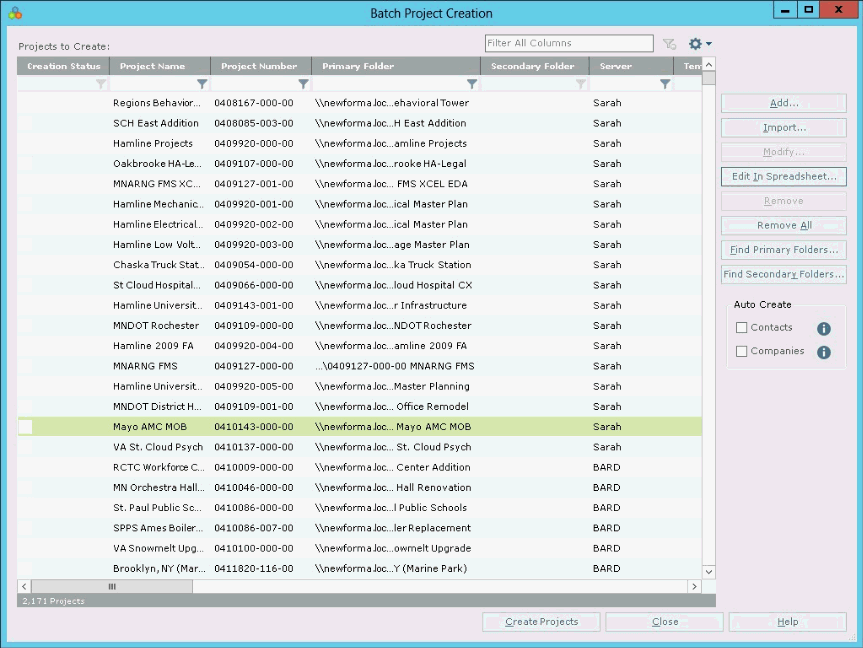
In the Batch Project Creation dialog box:
Mark the Contacts checkbox if you want to automatically create adhoc contacts and add them to the Project Center database using the email address if the contacts do not already exist in the Project Center database.
Mark the Companies checkbox to automatically add client companies as defined in the Client Company Name field if the companies do not already exist in the Project Center database.
Click Create Projects to link the projects to their respective folders and create the new projects in those folders.
The Newforma Command Utility on the Project Center Server provides additional options for project import. See Batch Create Multiple Projects Using the Newforma Command Utility in the Customer Community for more information.
