Batch Import Projects from a Spreadsheet
Batch Import Projects from a Spreadsheet
This procedure explains how to batch import projects into the Project Center projects database from a Microsoft Excel spreadsheet. Importing projects saves time, as you do not have to enter or re-import the data manually.
You must be a Project Center administrator to import projects from a template spreadsheet.
The order of the columns in the spreadsheet is not fixed. You can change the order if you like. Also, the columns are optional, which means you can remove columns you aren’t interested in. If you are editing existing projects the one exception is the <Id> column, which contains the unique id used to update the project when the Excel project is imported.
If you are defining new projects, then the <Id> column can be removed.
The table definition tags are: <BatchProjectCreationDataTable> at the top of the file and </BatchProjectCreationDataTable> at the bottom of the file. These tags are required and cannot be removed.
Project fields
The spreadsheet you create for this process must have at least one entry in the <project name > and <primary folder> columns, otherwise an error will be returned. The rest of the columns are suggestions.
<project number> – the project number.
<project name > – the name of the project – required.
<primary folder> – a network share of the primary project folder for file system paths. When mapping a drive to an EDMS folder that is not a file system you need the name of the EDMS server followed by a vertical bar followed by the path. For example: Sharepoint|/sites/SharePoint/Document Repository – required.
<secondary folder> – same format as the primary folder but this field is for secondary project folders.
<server> – the server name the project will be created on.
<template project name> – the name of a Newforma template project to use when creating your projects. Template projects can be used to default project settings to the values defined in the template project. If a field in the template project has a value in the Batch Project Creation table, the template value will be overwritten with the value defined in the Batch Project Creation table.
<status> – the status of the project.
<description> – the description of the project.
<type> – the type of the project.
<project manager email address> – the email address of the project manager.
<principal in charge email address> – the email address of the principal in charge.
<main contact email address> – the email address of the main contact on the project.
<client company name> – the name of the client company.
<client project number> – the project number for the client company.
<address line 1> – the first address line.
<address line 2> – the second address line.
<address line 3> – the third address line.
<city> – the city.
<state> – the state.
<zip> – the zip code.
<country> – the country.
<id> – the unique id that Newforma uses to identify this project. This is needed for updating projects that are edited in the grid.
To import projects from a spreadsheet
If you are not already there, open the Project Center Administration activity center (shown below) by clicking Project Center Administration from the Tasks panel of the My Project Center activity center, or from the Activities list.
Click the Projects tab.
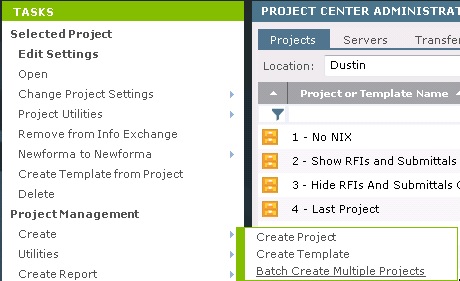
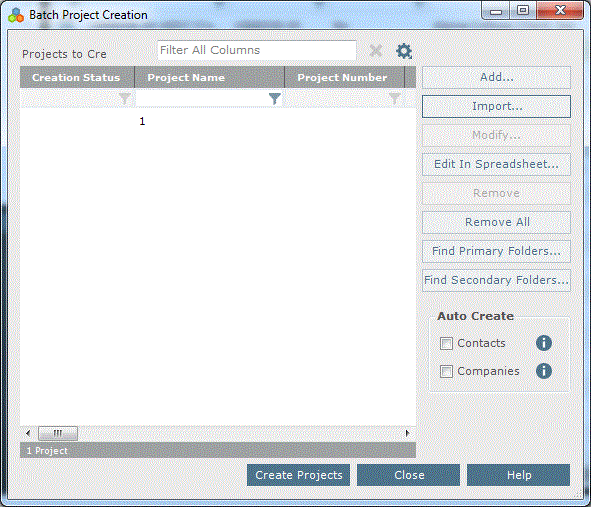
Click Create > Batch Create Multiple Projects from the Tasks panel, as shown here, to open the Batch Project Creation dialog box, as shown below:

Click Import to open the Select Spreadsheet dialog box.
If you do have a defined spreadsheet, click Edit in Spreadsheet instead to create a new blank spreadsheet.
Locate the projects spreadsheet, then click Open.
Click Create Projects when the projects are ready to be imported. The projects are added to the Project Center projects database. A message will appear indicating the number of projects imported or if there were errors.
