Customize the Company Name and Logo in the Default Form Templates
Customize the Company Name and Logo in the Default Form Templates
Use this procedure if you want to quickly customize the company name and logo in the default form template, which will then be applied to all forms and notifications that are used in all projects that reside on a Project Center Server.
You must be a Project Center administrator to perform this procedure.
To customize the company name and logo in form templates
If you are not already there, open the Project Center Administration activity center (shown below) by clicking Project Center Administration from the Activities list or the My Project Center activity center.
Click the Servers tab.
From the Servers section, select the Project Center Server on which you want to customize the company name.
The Type column lists the server types. Make sure the type is Project Center.
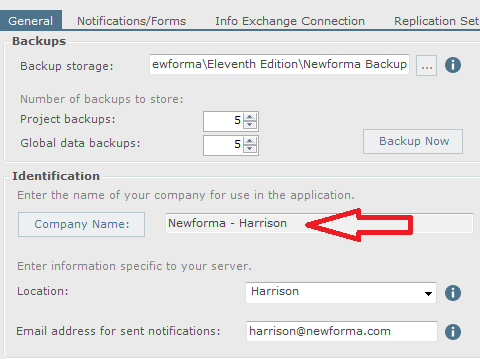
Click the General tab. In the Identification section, enter the name of your company in the Company Name field, as shown here:


Click Save Changes. The new name will appear in the headers in all forms and notifications for all projects on the selected server.
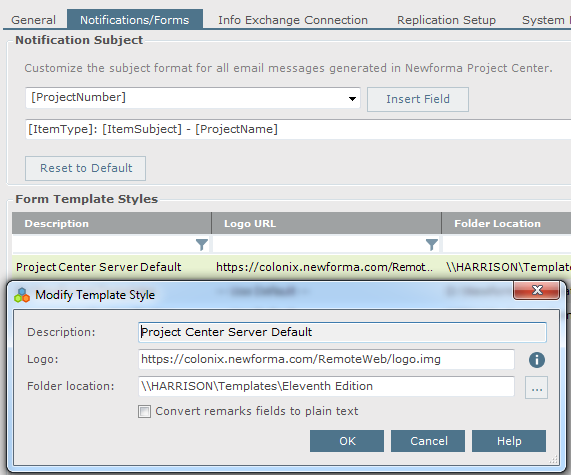
To customize the logo, click the Notifications/Forms tab.
Select the Project Center Server Default template from the Form Template Styles section, then click Modify to open the Modify Template Style dialog box, as shown here:

Enter the full path to the logo you want to use in the Logo field, then click OK. The new logo will appear in all forms and notifications for all projects on the selected server.
Repeat this procedure as necessary for any other Project Center Servers.
