Welcome to the Newforma Project Center Outlook Add-In
Welcome to the Newforma Project Center Outlook Add-In
The Newforma Outlook Add-in integrates Microsoft Outlook with the Newforma app for seamless filing between Outlook items and your projects. It enables you to file email items to a Newforma app project.
In order to utilize the new Newforma Outlook Add-in, users should have Newforma Cloud for authentication and Microsoft 365.
The supported platforms at this time:
- Outlook for 365 Windows and/or Mac
- To use the desktop client, users need to sign into Office.com, then click Install Office to install the desktop client application:

- Outlook Online
- Outlook for iOS
- Outlook for Android
Supported Exchange servers:
- Exchange Online
- Exchange On-Prem (2019 and 2016)
- Microsoft 365 mailboxes and Microsoft 365 clients are required. You can review the hybrid deployment prerequisites here. Access and run the hybrid configuration wizard here.
Note that Exchange server support is possible, but not recommended.
The platforms are based on the Outlook JavaScript API requirement sets. The Outlook Add-In utilizes set 1.8, therefore not all features are present on other platforms.
The email reading pane must be activated on the right or bottom for the add-in to appear. Otherwise, the user must open each email in order to use/activate the add-in. This is a Microsoft add-in limitation.
How the Newforma Addin files emails
The Newforma add-in (HTML 5) uses the Microsoft Graph Autofile functionality to complete. When you file using the Newforma add-in, it will move the email to the appropriate “Newforma – Items to File” project sub-folder in the user’s mailbox to get filed by the autofile functionality over the course of the day.
Note: In contrast to the legacy COM add-in, messages will not appear in the project until processed by autofile. However, the ‘Filed by Newforma‘ category will be applied immediately for all users.
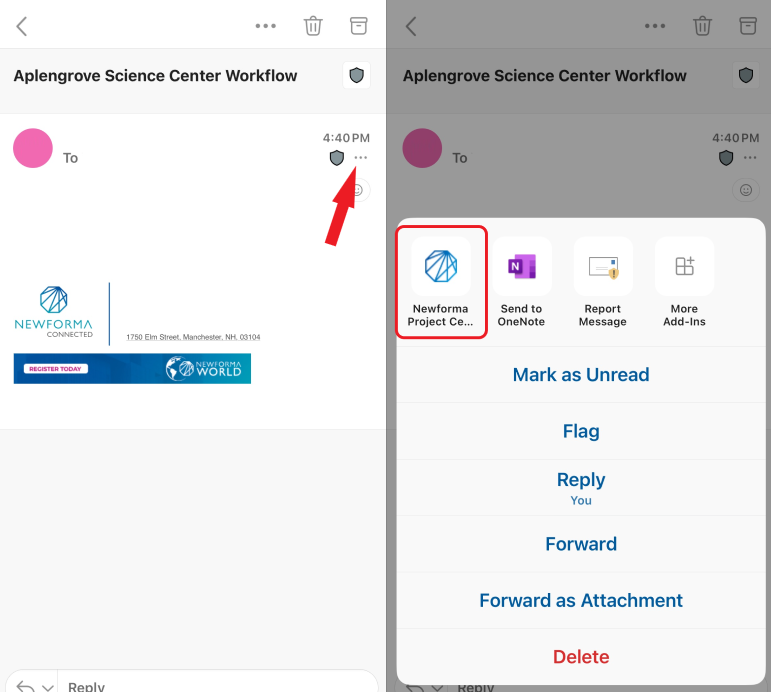
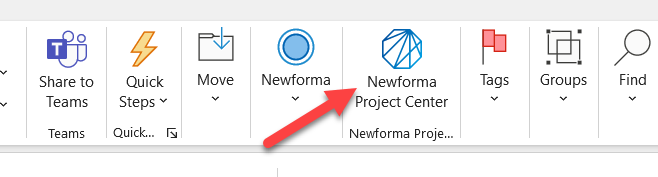
To launch the Add-In
In the desktop client, select an email to display the available add-ins in the ribbon. Click the Newforma icon to launch the add-in:
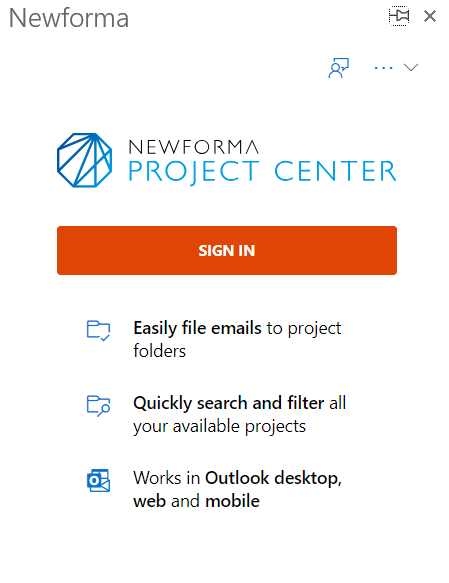
The Newforma add-in launches. Click Sign In:
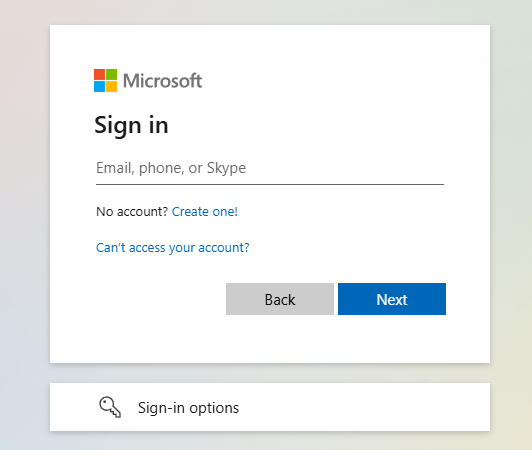
The Microsoft Active Directory sign in dialog box appears. The Newforma Outlook add-in integrates with Active Directory, meaning Newforma adheres to the ever-increasing need for IT departments to manage user access rights and policies from one location.
Enter your company-issued username and password and log in:
To view project suggestions
As you file an email, the add-in displays a list of suggested projects:
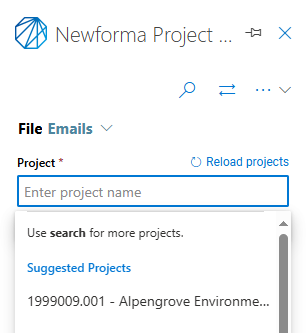
Projects suggestions are based on the following:
- Recent projects
- Internal sender
- External sender
- Body keyword match
- Subject keyword match
- Thread
Three project suggestions initially appear in the Suggested Projects section of the add-in. Scroll to see additional suggestions.
The more that emails are filed, the more accurate the project suggestions become.
If none of the suggested projects are the project you need, you can search for projects outside of your My Projects list. To do so, enter the project name or number in the Project field:
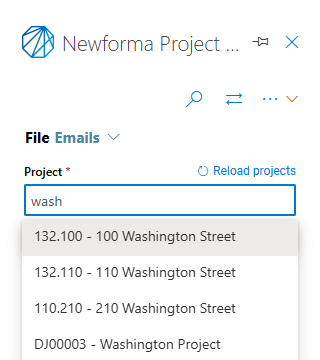
To file to projects outside of your ‘My Projects’, make sure the setting for ‘File all past emails in a conversation‘ is turned off
Please note: You are only available to search all projects when filing items as emails. If you are needing to file as an RFI, Submittal, or Action Item, the project you’re attempting to file to must be in your ‘My Project’ list.
To file an email to a project
Select the project you want to file the email to and click File to Project at the bottom of the add-in. Filed emails display a tag to indicate they have been filed by Newforma.
To file an email as an action item
Launch the Outlook Add-In. Click File Email and select File as Action Item from the dropdown menu:

The File As Action Item panel opens. The email’s subject appears in the Action Item Name field, and the body is automatically added to the Description. Any email attachments are added as supporting documents:
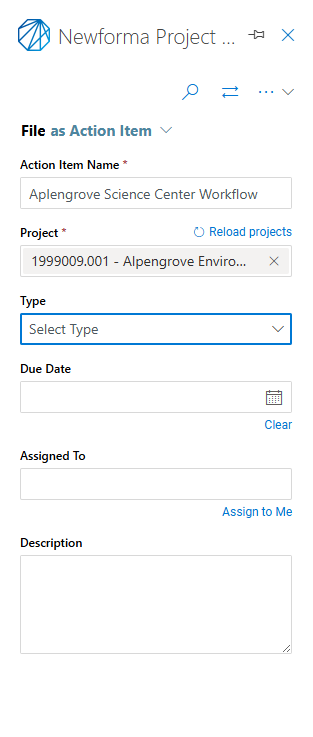
Start typing in the Project field to find the project where you want to file the email. The list populates with projects from your My Projects list. Select the appropriate project from the list:
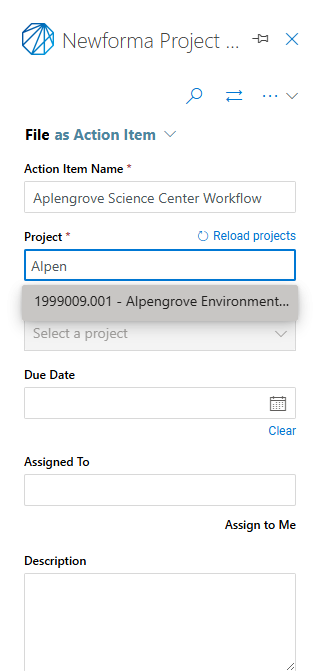
Once the project is selected, the Type field populates with the available action item types for that project. Select the type from the dropdown as needed.
Start typing the name/email of the project team member you want to assign the action item to in the Assigned To field. The Project Team list from the selected project filters based on your entry. You can also enter an email address for someone who is outside the project team. Select the assignee as needed.
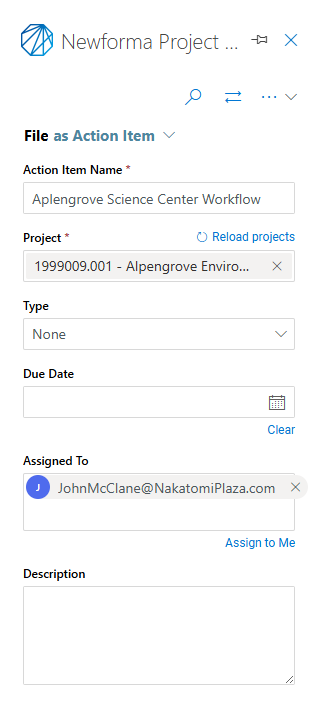
Click File as Action Item at the bottom of the add-in to file the email and create the action item.
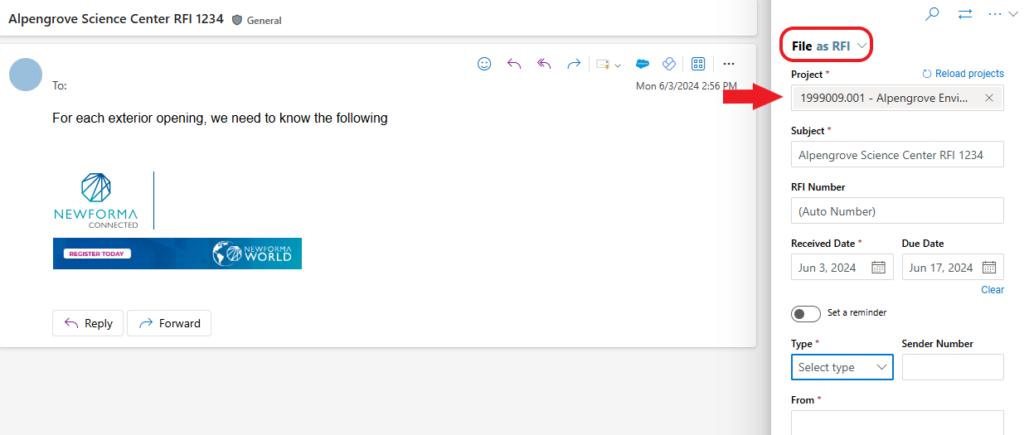
To file an item as an RFI
From the drop down, choose File as RFI. Make sure to select the correct project and to fill out all of the required fields.
- Project
- Subject
- Date
- Type
- From/To
- Question
- Purpose
To file an item as a Submittal
From the drop down, choose File as Submittal. Make sure to select the correct project and to fill out all of the required fields.
- Project
- Subject
- Spec Section
- Date
- Purpose
- From/To

To send and file emails
While composing an email, click the Newforma add-in icon and select the project you want to file to. The add-in and email message show that the email is marked to be filed into the selected project once it is sent:
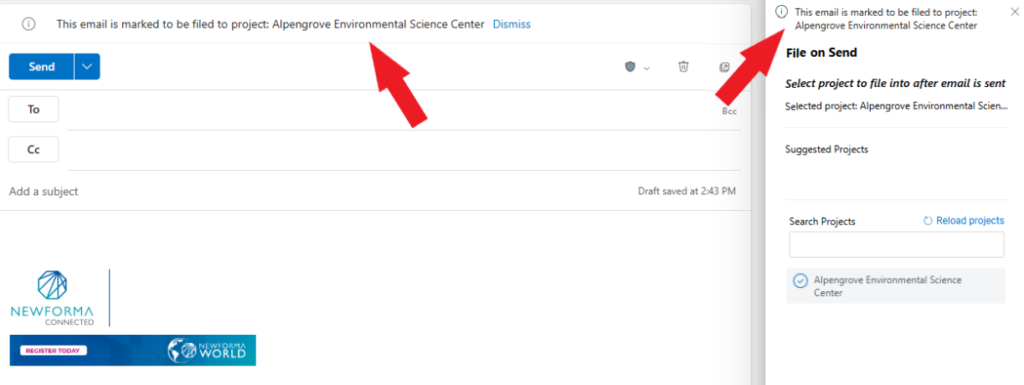
When selecting a project for send and file, the system starts to make calls to file the email in the background. If the email is saved as a draft or not sent the system can time out. In these cases, the email message will not be filed, even after it has been sent.
Important note for mobile users: The Send and File feature is not available on mobile through the Outlook Mobile client. This is a Microsoft limitation.
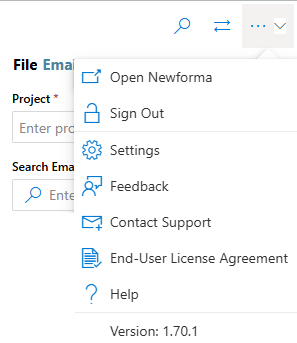
Outlook Add-In Settings Menu Options
The Outlook add-in Settings menu allows users to perform the following tasks:
- Open the Newforma web app by clicking Open Newforma
- Sign out, view the privacy policy, terms and conditions and the version number of the installed add-in;
- Access add-in Settings:
- Contact Support – This will automatically copy the add-in logs to your clipboard for you to send them to support when requested to do so.
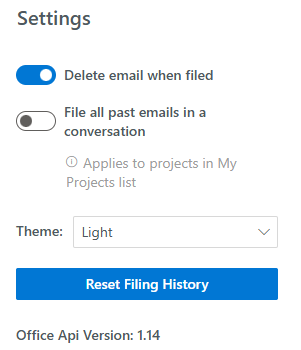
Settings options
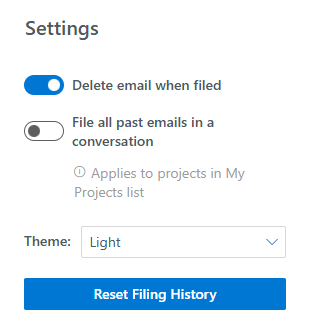
Delete email when filed – Once an item is filed to the correct project, the email item is moved to a users deleted folder in Outlook
File all past emails in a conversation – Use this feature to file all messages that are linked to the current message. Linked messages or messages that are part of a conversation, contain the same message ID in Outlook.
Reset filing history – Resetting the filing history clears out the learned criteria for ranking project suggestions.
Customize Outlook Web Client Actions
In the new Outlook Web UI, by default users must select an email and within the email message select the Apps icon to find available/installed add-ins:
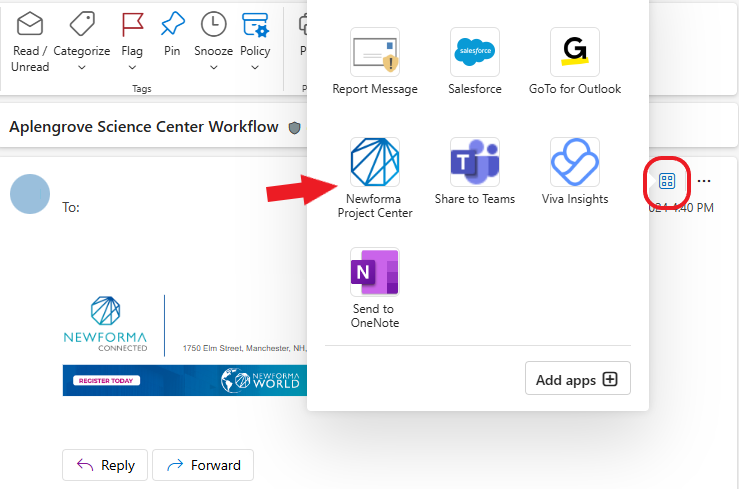
You can customize Outlook so that the Newforma Outlook Add-in icon is always available when an email is selected.
To make the Newforma Outlook Add-in icon always available
Select an email and press the Ellipsis (…) then Customize actions
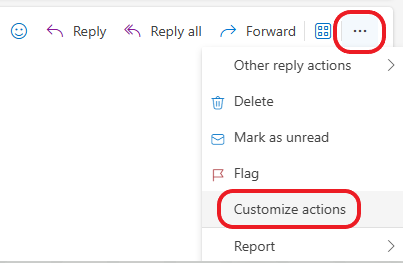
In the Customize Actions panel, please ensure the Newforma Project Center box is checked. This ensure that the Newforma Add-in icon is visible when an email in the inbox is selected.

Launch the Add-in for Outlook Mobile
- Select and open an email to view its contents.
- Tap the ellipses to open the email options and available add-ins: