Create a Project from a Template
Create a Project from a Template
To save time when creating projects, you can import data from a project templateProject templates are Excel spreadsheets used to supply configuration settings and default data for Newforma projects. Templates allow administrators to specify many of the settings they would normally be prompted for when creating a project.. After importing the template, all you have to do is edit the fields that are unique or blank in the new project.
You must be a Project Center administrator or the project creator to create a project from a template.
You must know the location of the project template before performing this procedure.
Example
Refer to the following Microsoft Excel spreadsheet for examples on how to format the project template: C:\Program Files\Newforma\Twelfth Edition\Project Center\Templates\Project Template.xlsx.
To create a new Project Center project from a template
If you are not already there, open the Project Center Administration activity center by clicking Project Center Administration from the Tasks panel of the My Project Center activity center, or from the Activities list.
Click the Projects tab.
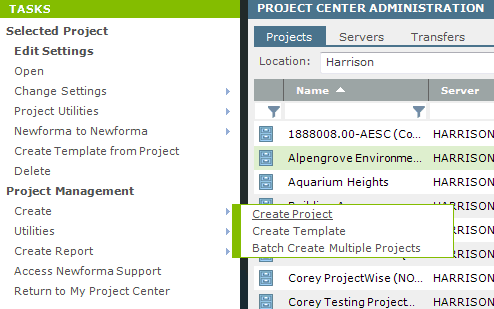
Click Create > Create Project from the Tasks panel, as shown here, to open the Create Project dialog box.
Select By Importing a Template Definition and click the ![]() button to open the Import from Spreadsheet Template dialog box as shown here:
button to open the Import from Spreadsheet Template dialog box as shown here:
Locate and select the template, then click OK. The data from the template is imported into the new project.
If you are importing data from a project or accounting system, enter the project number in the Project Number field. This project number can be used with embedded SQL statements in the template selected in the Project Template field. Project Center will execute the SQL statements and populate the new project with the data from whichever fields are specified in the template. If you need assistance with this feature, contact Newforma services at services@newforma.com.
On the Project Information tab, change the Project Name.
On the Project Folders tab, check each of the fields to verify they are pointing to the correct folder locations for the new project. Make any changes as needed.
Fill in the rest of the information in the tabs as necessary, then click OK when finished to create the project.
If new contacts were added to the project team from the template, they will not have Info Exchange accounts. To give the new project team members Info Exchange accounts, select them from the Project Team activity center and click Modify from the Tasks panel to open the Modify Project Team Member dialog box. Mark the Allow Web Access to This Project on Your Info Exchange Server checkbox for each user to create an info Exchange account.
See also Batch Create Projects.
